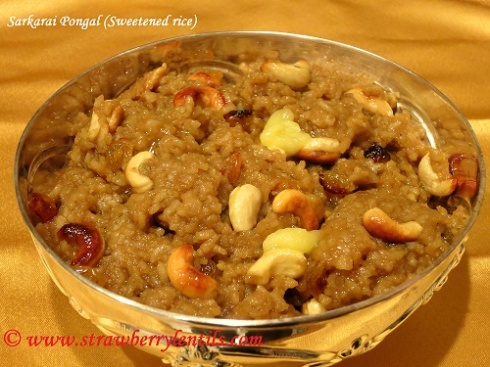
Sarkarai Pongal (Sweetened Rice)


Image

We celebrated pongal (the harvest festival) a week back. Leisurely posting the recipe a week later, that is how “fast” I am. Well, next year I can republish this post right on time, so I am happy for next year ;). Sarkarai Pongal is a very traditional, very basic and a very simple dessert, often offered in temples or made in homes on auspicious days. But don’t let that restrict you, this makes a great dessert for any day or any party. Another popular variation of this dish is “Akkara Vadisal” where rice is cooked in milk instead of water.

Making this sweet pongal involves only four basic steps. Cook rice, make brown sugar syrup, mix rice and syrup, add some roasted nuts and raisins. Child’s play , right ? It is really that simple. Hopefully, the tips I give below are helpful in simplifying the already simple recipe.

To make the sweet pongal, you will need :

  1. Uncooked rice – 1 cup (any kind is good)
  2. Moong Dal or split green gram – 1/4 cup
  3. Jaggery/Vellam/Dark Brown sugar – 1 cup
  4. Water (to cook rice) – 4 cups
  5. Water (for syrup – 1/4 cup)
  6. Cardamom powder – 4 tsp
  7. Cashew nuts – 3 tbsp
  8. Raisins – 2 tbsp
  9. Ghee / Melted Butter – 4 tbsp
  • First, we have to get the rice ready. In a pan or a pressure cooker, heat 2 tbsp of ghee or butter and roast the moong dal (green gram).

Image

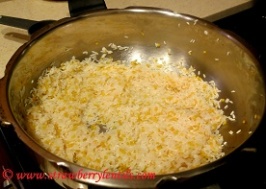
  • Rinse rice and add  rice to the pan and mix well that each grain is coated with ghee.

Image

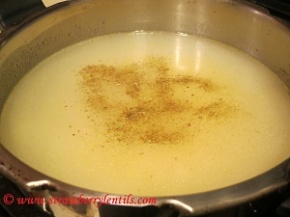
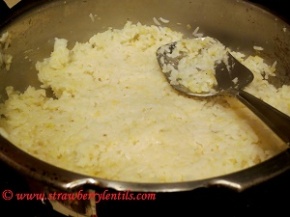
  • Rice and dal mixture has to be well cooked to really soft consistency, so double up the quantity of water used. Add 4 cups of water and 2 tsp of cardamom powder and cook the rice and dal until soft. When rice is cooked , mash it gently with the back of a spatula. (If not using pressure cooker, you will have to add more water).

ImageImage

  • Now to make the brown sugar syrup, mix 1 cup of brown sugar in 1/4 cup of water and heat until the sugar completely dissolves in water.

ImageImage

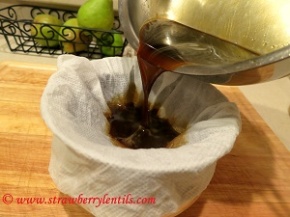
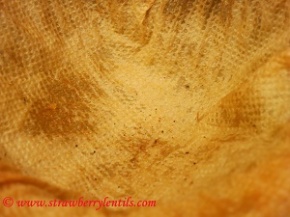
  • If you are using jaggery/vellam it is important to make sure the syrup is free of any impurities, so filter the sugar solution using a clean cloth. I used a wet bounty paper towel, it gets the job done.

ImageImage

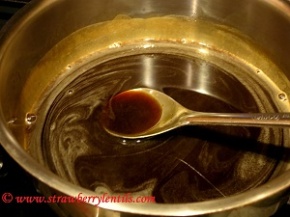
  • Now, put the clean syrup back on heat and bring it to a boil. You are looking for 1-string consistency, but when your syrup comes to a good rolling boil, you can be sure its there.

Image

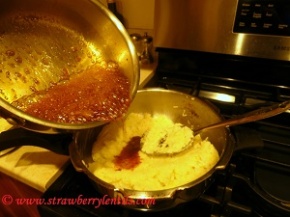
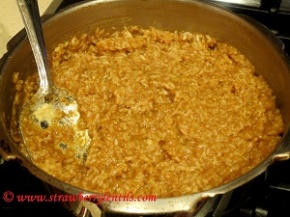
  • Add the syrup to the cooked rice and dal and mix thoroughly.

ImageImage

  • Now , for the last step : In a separate pan , add a tbsp of ghee/butter , and fry the cashews and raisins to golden brown and add to the rice.

ImageImage

Add the last spoon of ghee right before serving, and your sweet pongal is ready to be served to the king/queen in you 🙂

Some pointers :

  • Instead of making syrup, you can directly add the  brown sugar to rice. But I do not prefer that method, as the brown sugar tastes raw in the final pongal. Adding the syrup gives a well rounded taste.
  • I have only used cardamom powder, you can also add nutmeg, ground cinnamom or a pinch of ground ginger to elevate the flavors.
  • It is not very appealing when it is in a soupy consistency, often confusing the eater if its pongal or payasam (kheer). It should be in the”sticky rice” consistency.
  • Use milk to cook the rice instead of water and make a much creamier version of this pongal, which is also called as “Akkara Vadisal”.

Treat yourself to this yumminess effortless !!!!!!
Image

A heart filled with gratitude…..


I am giving a lazy start to the New Year, as always, it takes me forever to recover from a vacation. Even before 2013 ended, I pledged that my very first post in 2014 will be the expression of gratitude to my fellow bloggers who have showered me with their kindness, support and awards. Every award made me float in the air, inspired me and motivated me. Strawberry Lentils is my first ever blogging experience, and I owe it to all my friendly bloggers here to have made it a very pleasant experience. I have immense respect for every one of you and I am a big fan of all your writings , photographs and of course, the yummilicious recipes. Even though I did not follow through with any rules, I hope you will kindly accept my heartfelt thanks…..

Image

(Photo from : http://www.flickr.com/photos/16216142@N02/1801682819/)

My very first award came from Charanya of VeganRecipesOnline. Charanya has an amazing collection of vegar recipes from various cuisines. One of my favorites is her Vegan Thai Curry (http://veganrecipesonline.wordpress.com/category/thai-curry/). Thank you Charanya for the “shine on” award and your kindness.

Thank you Aruna of Aahaaram for the Versatile Blogger Award“. Visiting Aruna’s blog is like visiting home for me. All those wonderful recipes of yummy comfort foods, I am a huge fan.  Her collection of Andhra recipes is  such a treat to spice lovers like me. Here is one of my favorites, the signature Andhra Pesarattu recipe (http://aahaaram.wordpress.com/2013/12/13/mla-pesarattu-or-pesarattu-with-upma/). Thank you Aruna for your support.

Another Versatile Blogger Award from Sugarfreesweetheart’s Priya . Thank you Priya for your kindness. Priya’s blog features diabetic friendly healthy recipes, which are good for everybody, diabetic or not. Contrary to the popular belief of diabetic diet being lackluster….her collection of recipes are so yumm and colorful and flavorful, here is one for sample : her gorgeous looking Bisibelabath (http://sugarfreesweetheart.com/2013/11/25/moms-bisi-bele-bhath/). I have to thank Priya again for her generosity to have nominated me for “Dragon’s loyalty award“.

Thank you Namrata of MyFoodTapestry  for the “Liebster Award“. I am a huge fan of Namrata’s blog not just for her unique recipes, but also for her interesting style of writing and beautiful photographs. Even those who are not foodies will enjoy Namrata’s blog because of her witty writing. If you are a foodie, then her posts are such treats , as they always come not just with a recipe, but exploring all possibilities for that dish…it is such a pleasure reading her posts. I have self declared her as my bread guru, as she whips out those flat breads and paavs with so much ease and perfection. Here is one of my favorites, her post on paav that left me in awe …http://myfoodtapestry.wordpress.com/2013/11/16/mumbai-special-pav-bhaaji/

Thank you FightForTheBite for “I’m part of WordPress Family” award. I enjoy the love of chocolate expressed in these recipes as I share the same love. Check out the awesome marbled cake recipe here http://fightforthebite.wordpress.com… There are many more droolworthy recipes here.

Thank you Tanusree for the WordPress Family award. How wonderful will it be to have delicious recipes certified by a nutrition expert ??? well, thats what we get in her blog. Her recipes are so yummm, they almost overshadow the fact that they are also so healthy. Here is a sample : her awesome carrot halwa recipe http://tanusreeroy.wordpress.com/2013/08/19/low-calorie-gajar-ka-halwa-carrot-pudding-ayurveda-recipe/.

Thank you Anne of TalesAlongTheWay for the Dragon’s Loyalty Award. I enjoy Anne’s travelogue, reading her thoughts on Indian politics is very refreshing. When I read her posts , it makes me feel as if I am travelling with her. And if you think you know India so well, then challenge yourself by taking her quiz at http://talesalongtheway.com/2013/11/12/how-well-do-you-know-india-take-a-quiz-and-find-out/ My scores…… I am keeping it a secret 🙂

Thank you Chintal of ChinsKitchen for the Liebster Award. If I can make up my own award I will present Chintal with “The Queen of Innovation” award. Every single recipe of hers promises her unique approach to it, and it always leaves me wondering “how come I never thought of that”. She combines things that are never put together before and make them work magically. Shrikhand as your frosting or gulanb jamuns in  cheesecakes.. there is always novelty in her recipes. Here is a recipe of hers that was a huge hit with my kids : The Makai Paka (http://chinskitchen.wordpress.com/2013/11/12/makai-paka-hors-doeuvres/)

Thank you Pavithra of Eat,Live,Burp  for passing on the “Sunshine Award“. Along with awesome recipes, Pavithra also gives product and restaurant reviews. Be sure to check out her reviews before testing out a new TraderJoe’s product or visiting a new restaurant in British Columbia and Washington Areas. Here is a sample :http://eatliveburp.net/2013/03/01/eat-your-way-through-vancouver-bc-and-an-exciting-update/

Thank you once again to all the above mentioned bloggers for graciously passing on awards to me.

I also would like to mention  few other bloggers whose posts I greatly enjoy.

  1.  Honk if you’re Vegan http://honkifyourevegan.com/
  2. Anjana at the corner of happy and harried http://happyandharried.wordpress.com/
  3. SimplyVegetarian777 http://simplyvegetarian777.wordpress.com/
  4. This is Thirty http://andthisisthirty.com
  5. Chef Mimi http://chefmimiblog.com
  6. FoodBod http://foodbod.wordpress.com
  7. Shivaay Delights http://shivaaydelights.wordpress.com
  8. Lisa’s Project Vegan http://lisasprojectvegan.com
  9. VegCharlotte http://vegcharlottenc.com
  10. The Novice Gardener http://thenovicegardener.wordpress.com
  11. Cooking with SJ  http://cookingwithsj.com

My sincere thanks to all my fellow bloggers ,followers and my friends for your continued support and kindness. Wishing you all a wonderful 2014 ! And a very happy Pongal/Sankaranthi to those who are celebrating…

Thank You !!!!!!!!!!!!!!!!!!!!!!!!!!!!!!!!!!!!!!!!!!!!!!!!!!!!!!!!!!!!!!!!!!!
Image

(Picture from : http://theweddingguy.ca/blog)

Baked Tofu Fries


Image

There is nothing much to say about this recipe, actually there is nothing much to this recipe either :).  My kids love fries and they also love tofu. I have seen tofu responding very well to baking. So this recipe was a no-brainer, crunchy fries (just the way  they want it) made with less than a tbsp of oil (just the way I like it 🙂 ).

To make this healthy munch, you will need :

1. Extra firm organic tofu (I used half the slab for this recipe)

2. Chilli powder or paprika – 1 tsp

3. Garlic Paste or Garlic powder – 1 tsp

4. Salt to taste

5. Oil – 1/2 tbsp

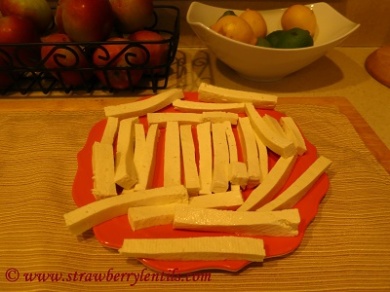
  • First cut the tofu into strips. If you prefer super crunchy fries, cut them very thin. I prefer crunchy on the outside and soft on the inside kind, so I did medium cuts.

Image

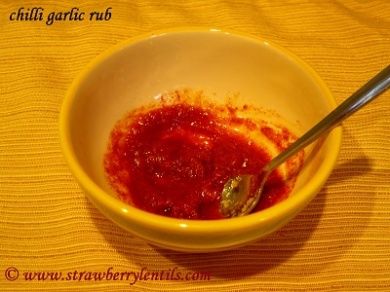
  • For the rub, I mixed red chilli powder, garlic paste, salt and oil. You can also grind red chillies and garlic cloves to make a fresh rub or use the store bought chilli garlic paste.

Image

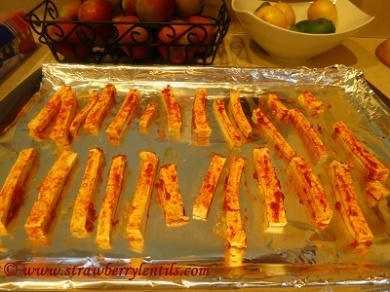
  • Rub the chilli garlic mix on the tofu strips gently. Even the extra firm tofu breaks easily, so be gentle :).  Line a baking tray with foil or grease the tray with cooking spray and place the tofu strips on the tray in a single layer. Bake at 425 degrees for about 12 minutes and then flip the strips and bake for another 8 – 10 minutes , until your preferred texture is reached.

Image

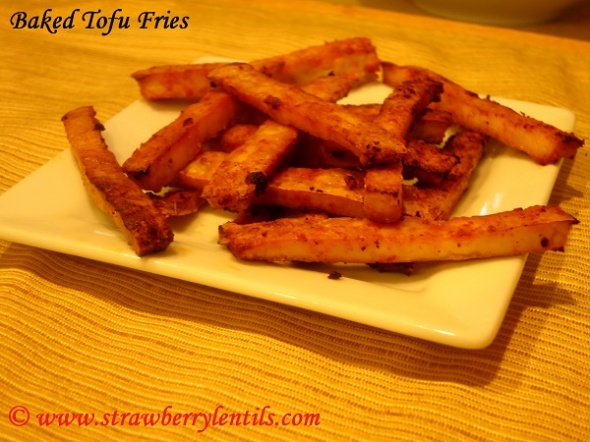
  • As I expected the golden crunchy fries were gone in minutes and the kids were complaining that I didn’t make enough :). Well, there is always next time :).

Image

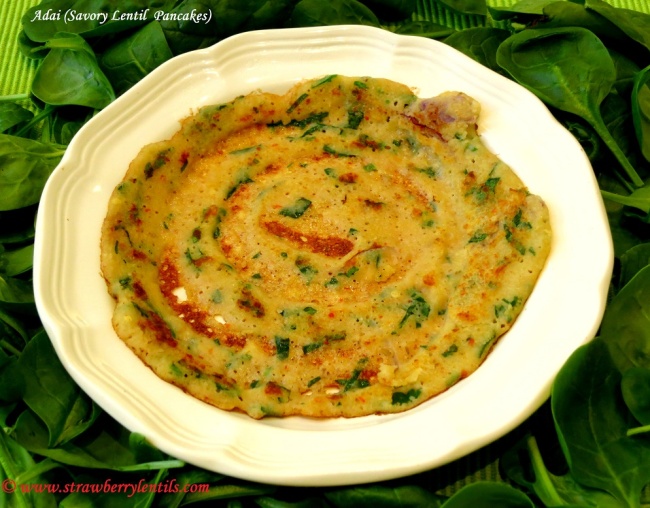
Adai (Savory Lentil Pancakes)


I am beginning this post with an apology to Sugarfree Sweetheart Priya , because this recipe was intended to be part of the diabetic friendly food week she hosted, but did not make it in time :(. It was one of those weeks, where everything seemed calm and quiet until things started rolling and before you knew, it was an avalanche and you are buried deep under trying to catch a breath. It was frustrating to have all the photos in the camera, yet not able to find an hour to sort through them and post the recipe online. However, it was a happy avalanche , had my college buddy over for thanksgiving, and met two other college mates over the weekend and it was an unplanned and unintended mini college reunion, which is always fun.

Even though I didn’t post in time, the recipe is still a very diabetic friendly food and I just love it for its taste. I also have a weird personal connection with this “Adai”. In May 2002, suddenly I started craving Adai, so I kept  making them two or three times a week, and two weeks later I found out that I was pregnant with my first child. And in July 2005, when I started super-craving Adai again, I just ran to the store and got an early pregnancy kit and guess what , I was pregnant with my second child. Pregnancies and the cravings…….. 🙂   No  more crazy cravings…… and thank God for that !
So here is my Adai recipe for the Sugarfree Sweetheart’s Diabetic friendly food week:

Image

To make the adai batter , you will need :

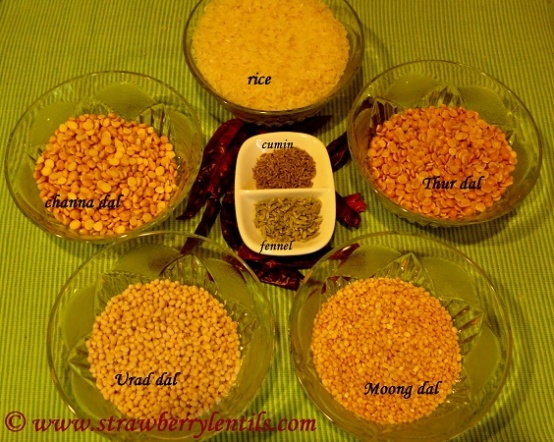
  1. Rice – 1 cup (use brown rice instead)
  2. Thur dal (split piegeon peas) – 1/2 cup
  3. Channa dal (split chick peas) –  1/2 cup
  4. Moong Dal (green gram) – 1/2 cup
  5. Urad Dal (black gram) – 1/2 cup
  6. fennel – 1 tsp
  7. cumin – 2 tsp
  8. dried red chillies – 2 or 3 (5 or 6 for spicier adais)

Image

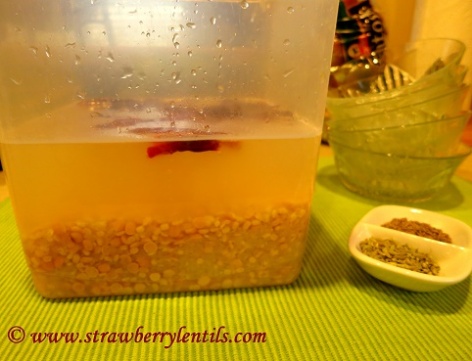
  • Soak the rice and lentils in water for 3 hours. I also soak the red chilles with them as it helps them to grind better.

Image

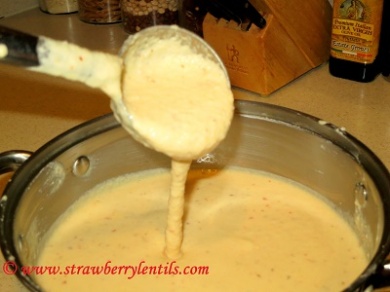
  • After 3 hours, grind the soaked rice and lentils with red chillies, cumin, fennel and salt to make a coarse batter. I grind in my blender and it takes only two minutes.

Image

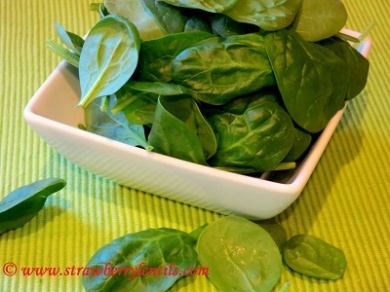
  • You can make pancakes with just plain batter. But adding onions and greens add more texture and taste to the adais. Traditionally, drumstick leaves are used. They are not available here, so I use spinach.

Image

  • Thinly slice an onion and chop  baby spinach and add to the the batter.

Image

  • Heat a skillet and grease with cooking spray. Pour a spoonful of batter and spread evenly.

Image

  • When you see the adai browning slightly, flip over and cook the other side.

Image

  • Flip one more time and cook until you see brown spots. The lentil batter takes longer to cook.

Image

Adais can be served with coconut chutney or a dollop of yogurt. If you ask me, they are good on their own :).

Image

Banana Blossom curry (Vaazhaipoo curry)


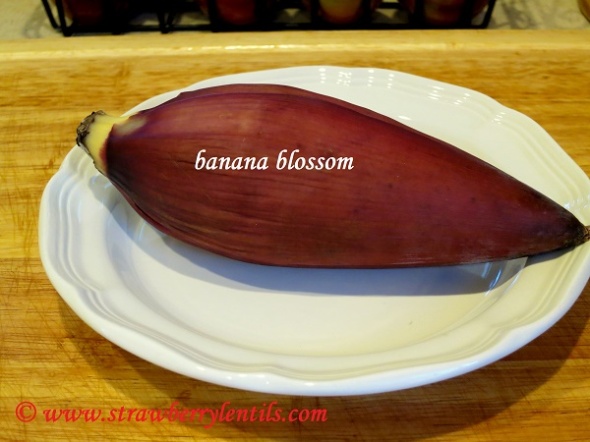
The banana tree is a true giver, all parts of the plant : the tender bark, the leaves, the flowers , the fruits…. either are edible or they aid in cooking. Banana blossoms, rich in antioxidants , flavonoids and vitamin E are found to stabilize blood sugar levels and elevate mood among other health benefits. Prepping the flower for cooking can be cumbersome, but its unique taste is completely worthy of the time and efforts.

Image

If you are new to cooking with the blossom, this post can show you how to properly prep the flower. The blossom can be used in stir fries, salads, stews and curries. The most popular concoction is the “vazhaipoo vadai” (crispy patties made with chickpeas and the banana flowers). Though the flowers can be used in any curry, here I have given my mushroom curry recipe, replacing mushrooms with the banana flowers.

Without further ado, here is how to prep the blossom for cooking :

[Either use  food prep gloves or rub sesame oil on your fingers before working with the blossom to avoid staining.]

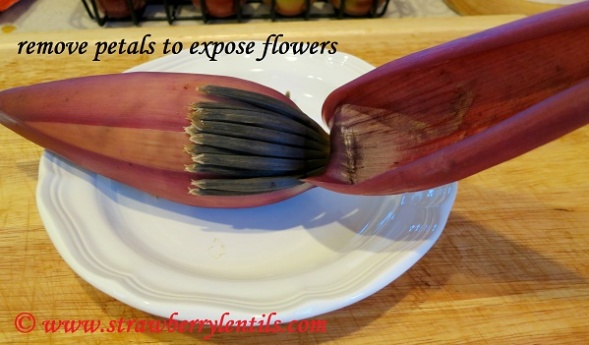
  • The petals are layered on top of one another and as you remove each petal you will find the cluster of tiny flowers inside.

Image

  • Actually in a fresh banana blossom , the flowers are slightly pinkish (as shown in the image below). However, the blossoms I get here are either refrigerated or frozen before they make it to the stores, so the black color. However, the color doesn’t affect the taste.

Image

[Image from : http://www.moorheadandrutter.com.au]

  • As you remove the layers you will notice the flowers getting smaller and tender.

Image

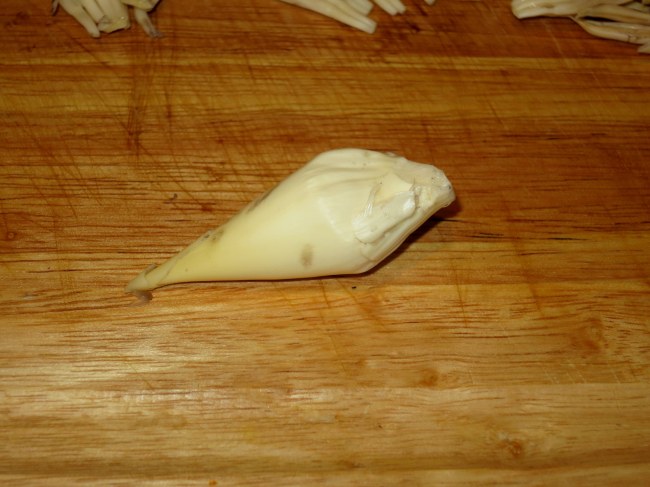
  • Finally you will end up with this beautiful tender bud, which can be either eaten  raw or sliced up and used in cooking.

Image

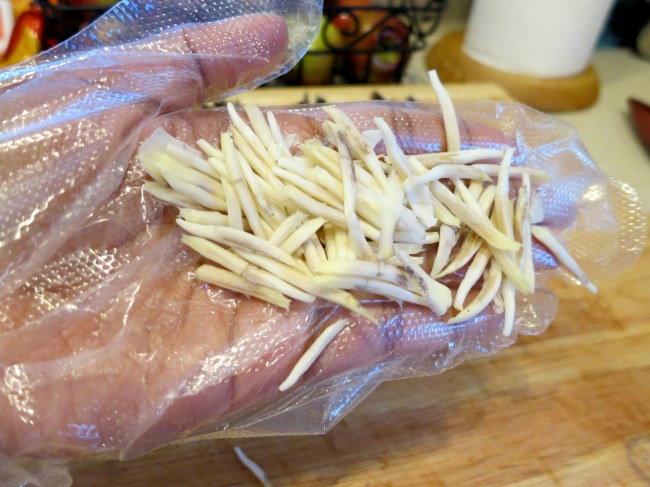
  • Once you have removed all the flowers, each flower must be individually prepped by removing some unwanted parts (similar to deveining a shrimp).

Image

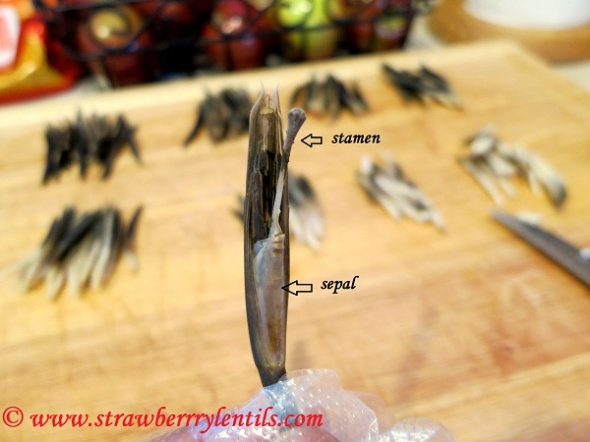
  • Each mature flower has  a stamen and a sepal (a wax paper like layer). It is important to remove both , as the stamen and sepal will stay raw even after cooking, resulting in an unpleasant texture and taste.

Image

Image

  • It is time consuming but if it is any consolation, only the outer 4 or 5 clusters will have stamen and sepal. The middle clusters won’t have a prominent sepal. The inner flowers are very tender and they can be used as such.

Image

  • Soak the cleaned flowers in diluted buttermilk until you need them.

Image

This concludes the prepping of the banana blossom. No matter what you choose to make with them, the above steps have to be done first.

Now for the curry recipe :

I normally make this curry with mushrooms. The cooked flowers have a similar texture to mushroom, so I figured this would be a good choice. You can add the florets in any curry of your choice.

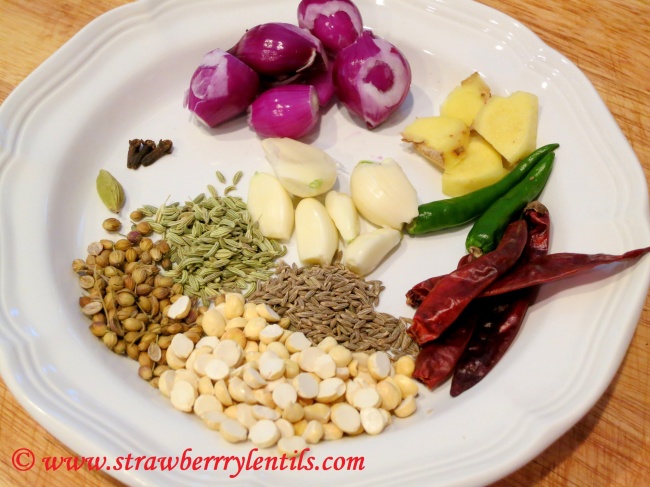
To make the cooking sauce for this curry, you will need :

Image

  1. Pearl Onions – 5 or 6
  2. Ginger – 1 inch piece
  3. Garlic – 4 or 5 cloves
  4. Green chilli – 1 (optional)
  5. Dry red chiilies – 3 or 4 (use red pepper flakes instead)[use only 1 or 2 chillies for milder curry]
  6. cloves – 3
  7. cardamom – 1
  8. fennel – 1 tsp
  9. cumin – 1 tsp
  10. coriander seeds (dhaniya) – 1 tsp
  11. roasted gram dhal (pottukadalai) – 1 tbsp (replace with cashews or grated coconut)

I know thats a lot of ingredients, but they result in a very aromatic curry. No fancy ingredients anyways 🙂 . Grind all the above ingredients with little water to make the cooking sauce.

Image

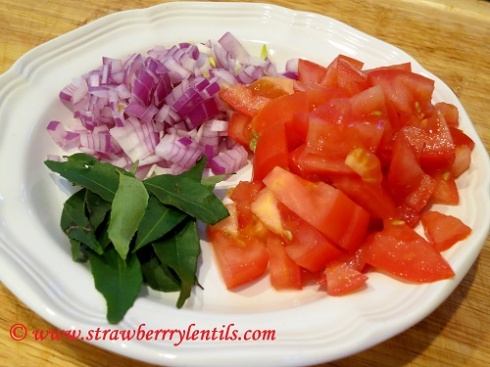
  • You will also need :
  1. onions – 1 medium (chopped)
  2. tomatoes – 1 large or 2 medium (diced)
  3. curry leaves – few
  4. turmeric powder – 1 tsp

Image

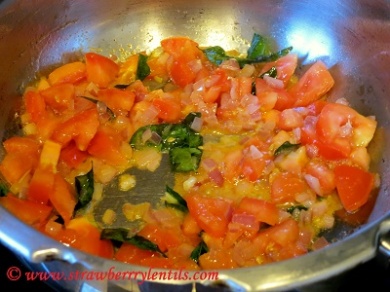
  • In a pan , heat a 2 tsp of oil, and saute the onions and curry leaves. Then add the tomatoes and cook until tomatoes soften.

Image

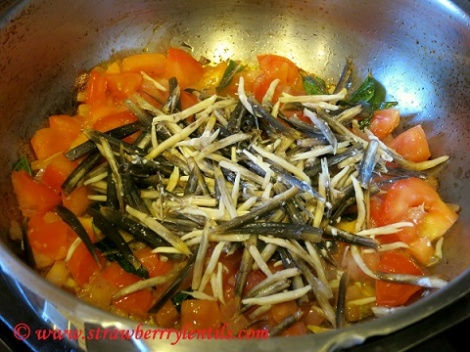
  • Add the banana flowers (that were soaking in buttermilk) to the pan and saute.

Image

  • Add the cooking sauce , turmeric powder, salt and mix well.

Image

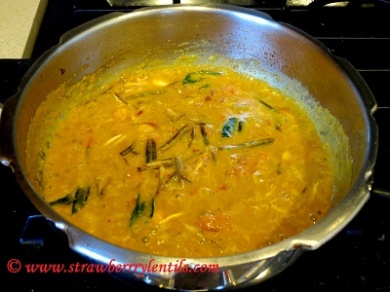
  • Add about half a cup of water and cook until the flowers are tender and oil starts to separate. It will take about 15 – 20 minutes in medium heat.

Image

I like this curry for its flavors and also that it goes well with rice, rotis, idli and dosa. You will definitely appreciate the unique taste of banana flowers in this curry. Hope you try it 🙂 !